FasterPay Woocommerce plugin
FasterPay partners with Woocommerce to allow merchants anywhere in the world to start taking payments.
Prerequisites
- In order to use the FasterPay Woocommerce Module, you need to have an active Wordpress website with Woocommerce pre-installed.
- You’ll also need a FasterPay account. You can register here: FasterPay SignUp.
Step 1: Set up your shop
You can start setting up your shop using the instructions from Woocommerce getting started tutorial.
Step 2: Download the FasterPay Woocommerce plugin
- Open FasterPay Woocommerce Github Page, and download the latest release:
fasterpay-module-woocommerce-x-x-x.zip
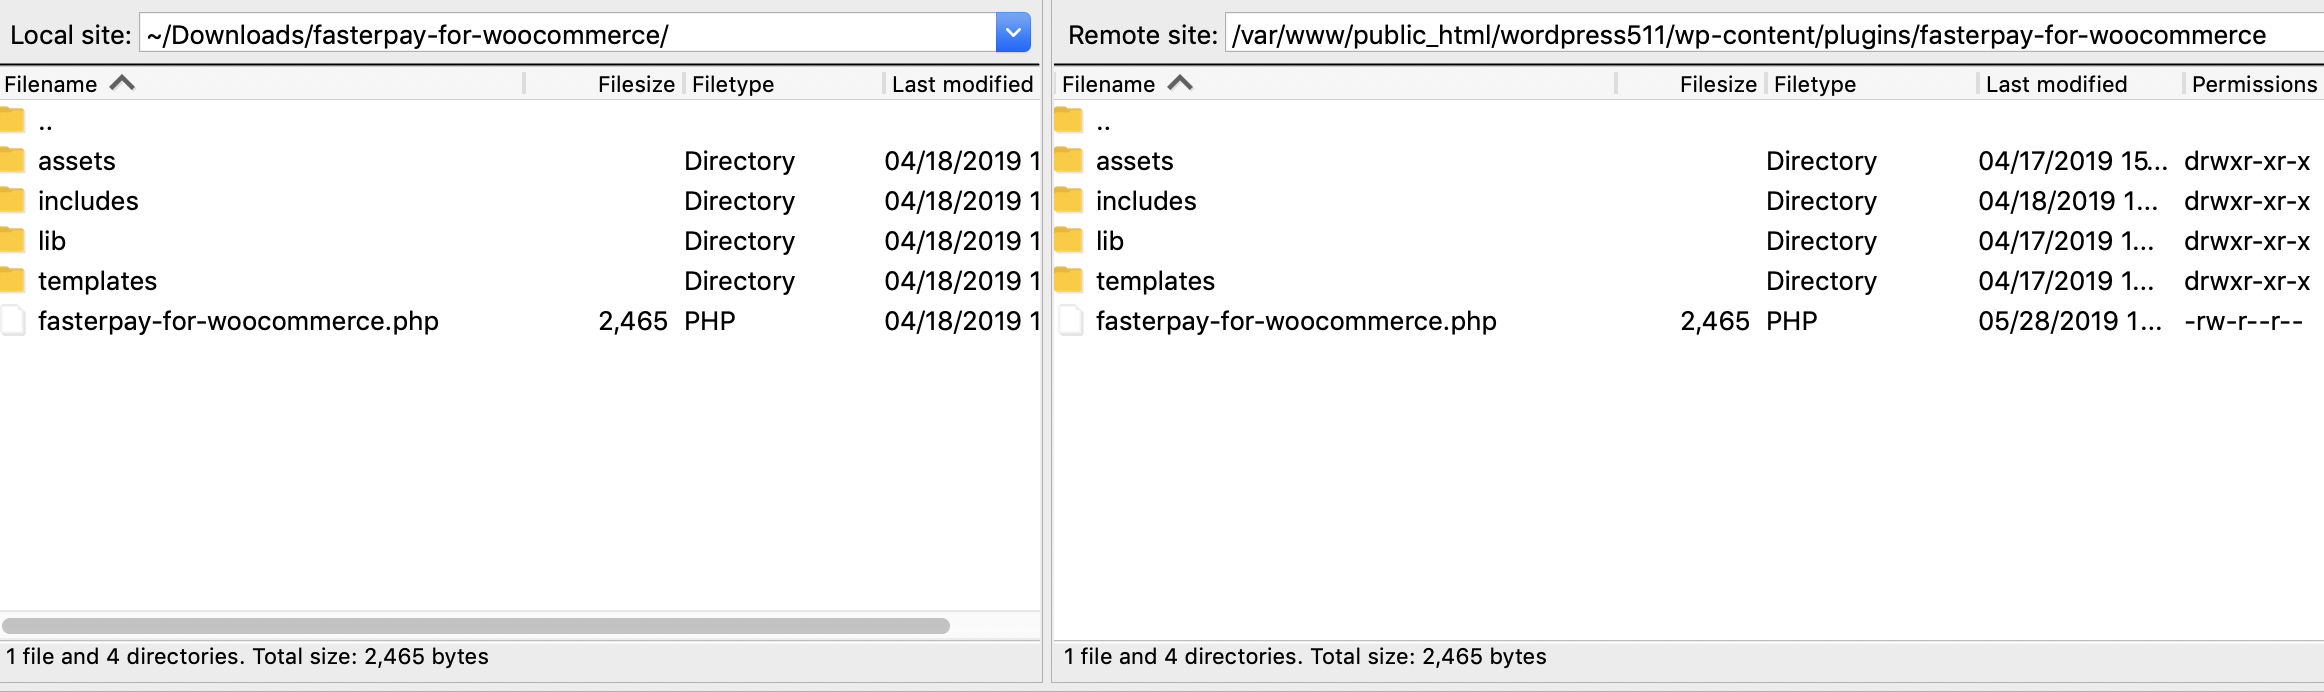
Step 3: Install the plugin
- Upload the plugin into your WordPress plugins directory, preserving the folder name fasterpay-for-woocommerce using an FTP client of your choice.
-
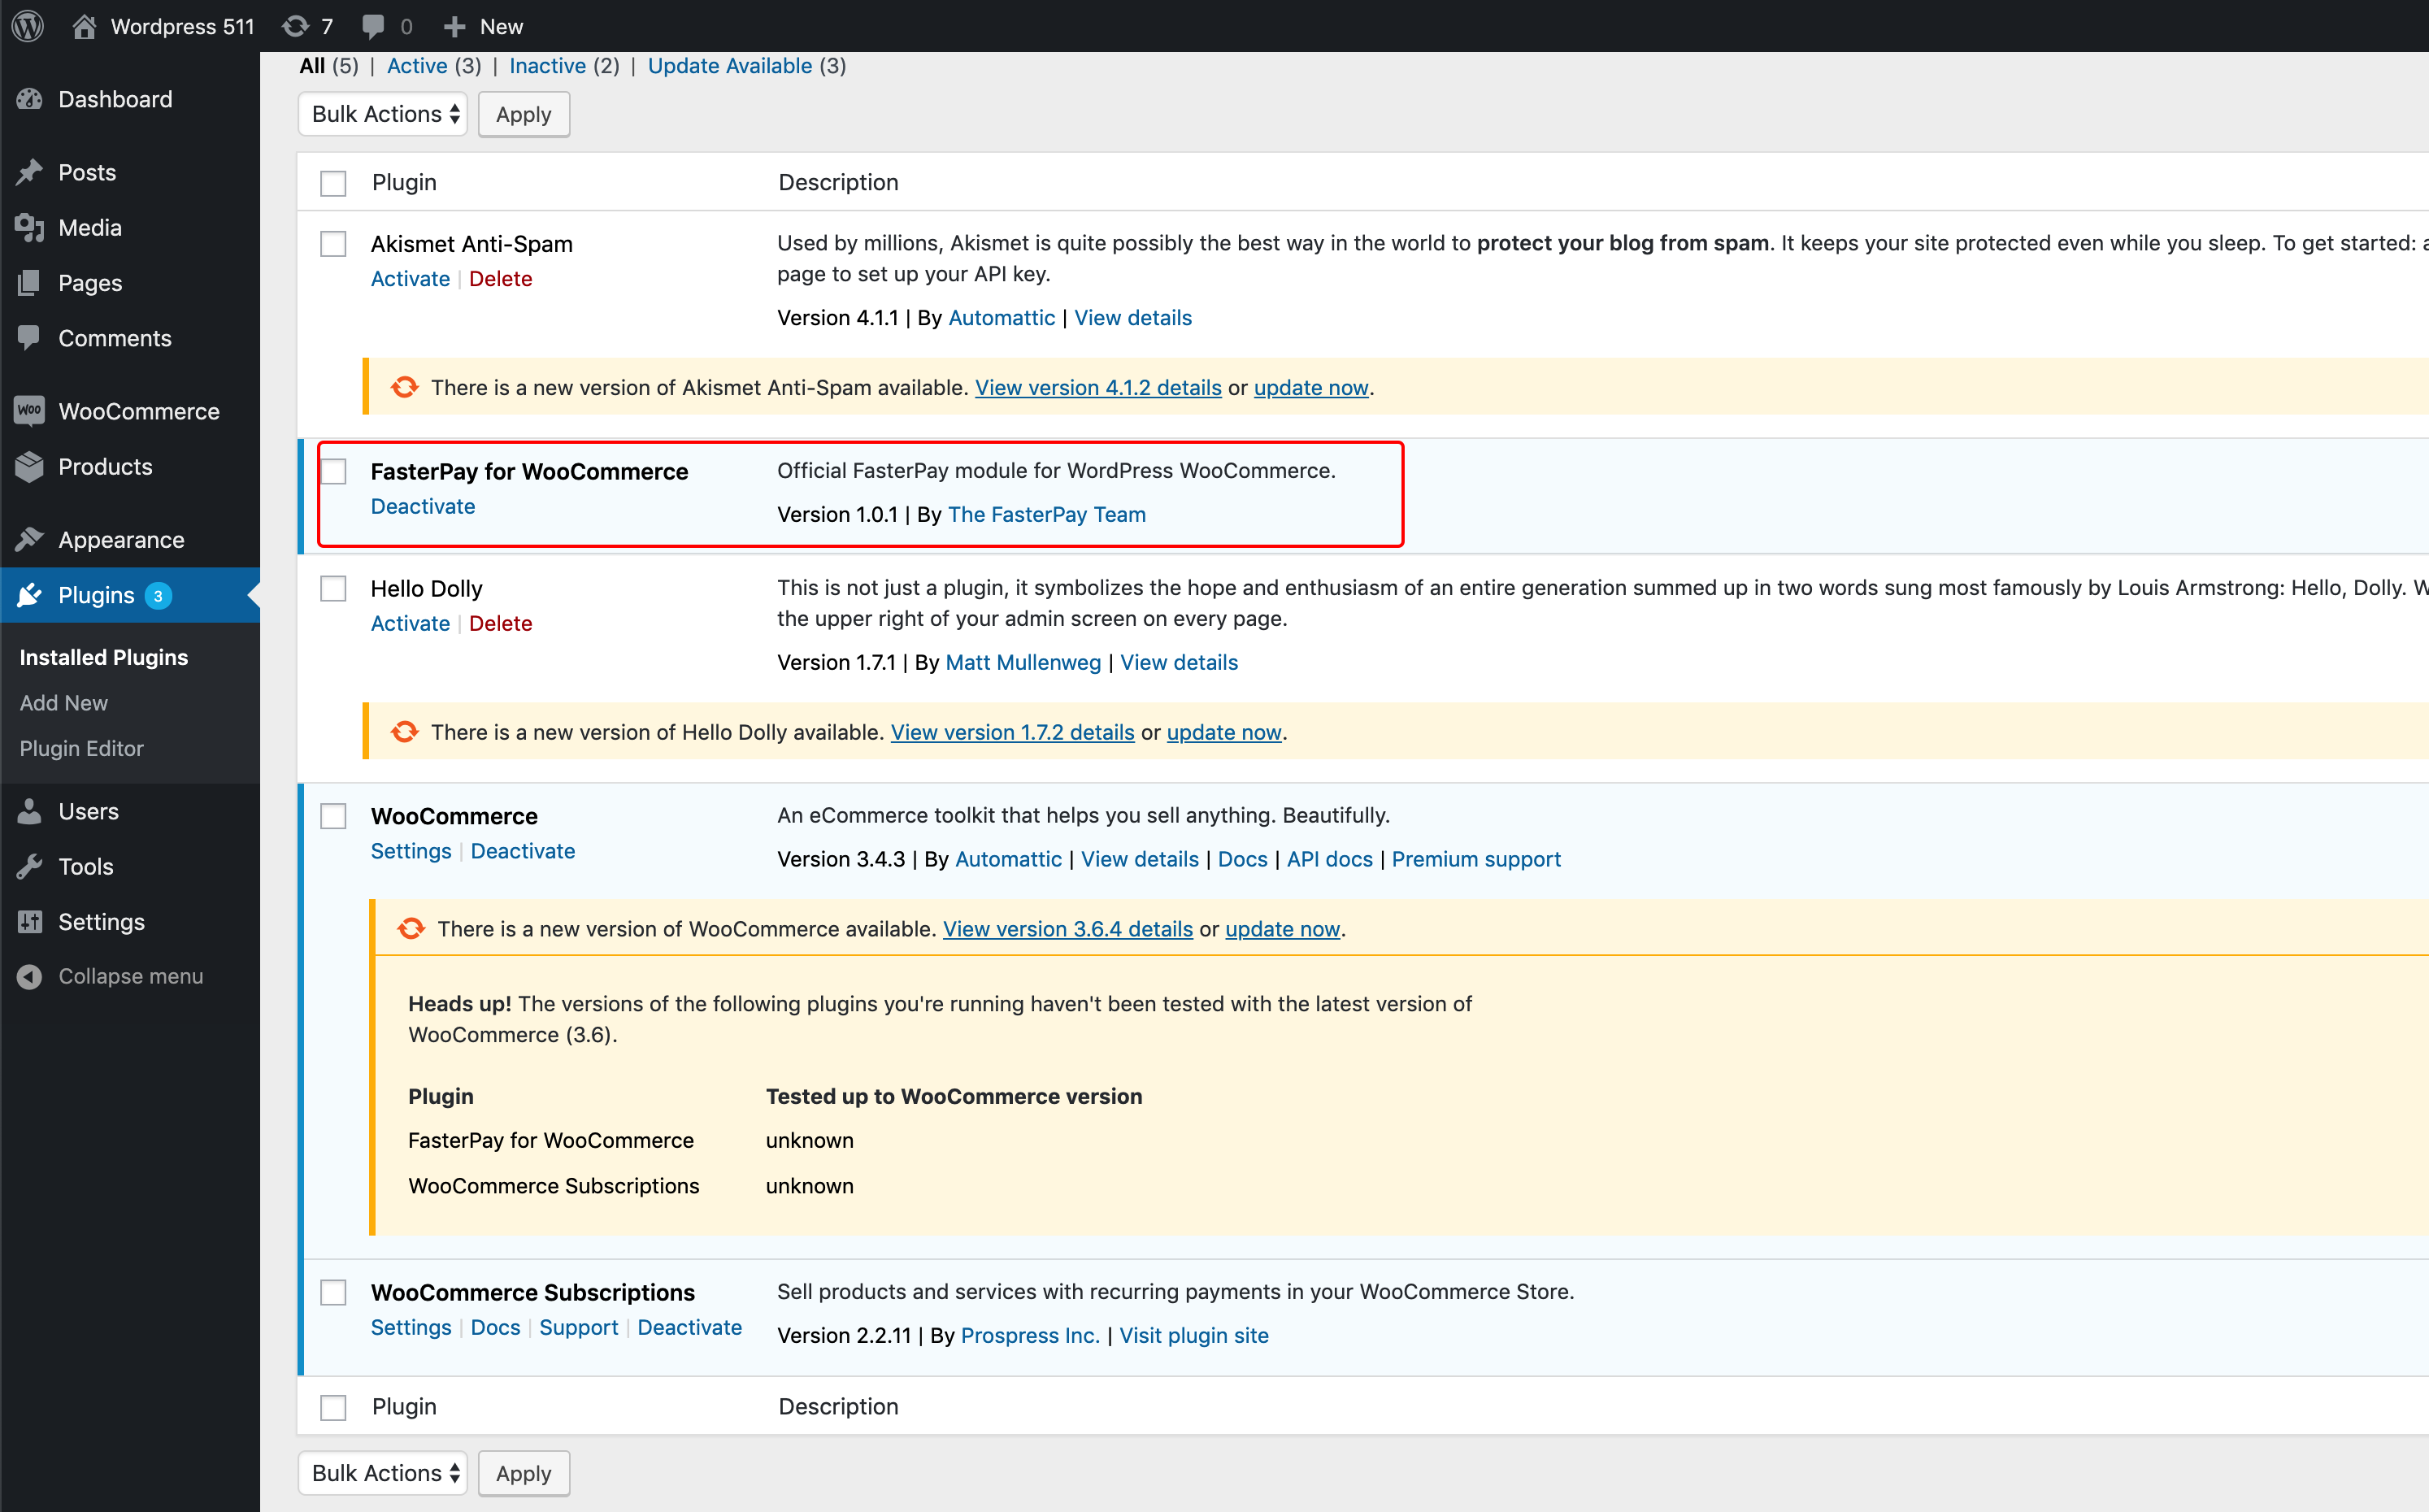
Log into your WordPress dashboard, navigate to your Plugins section, activate FasterPay for WooCommerce.
-
Activate FasterPay for Woocommerce plugin
Step 4: Configure the plugin
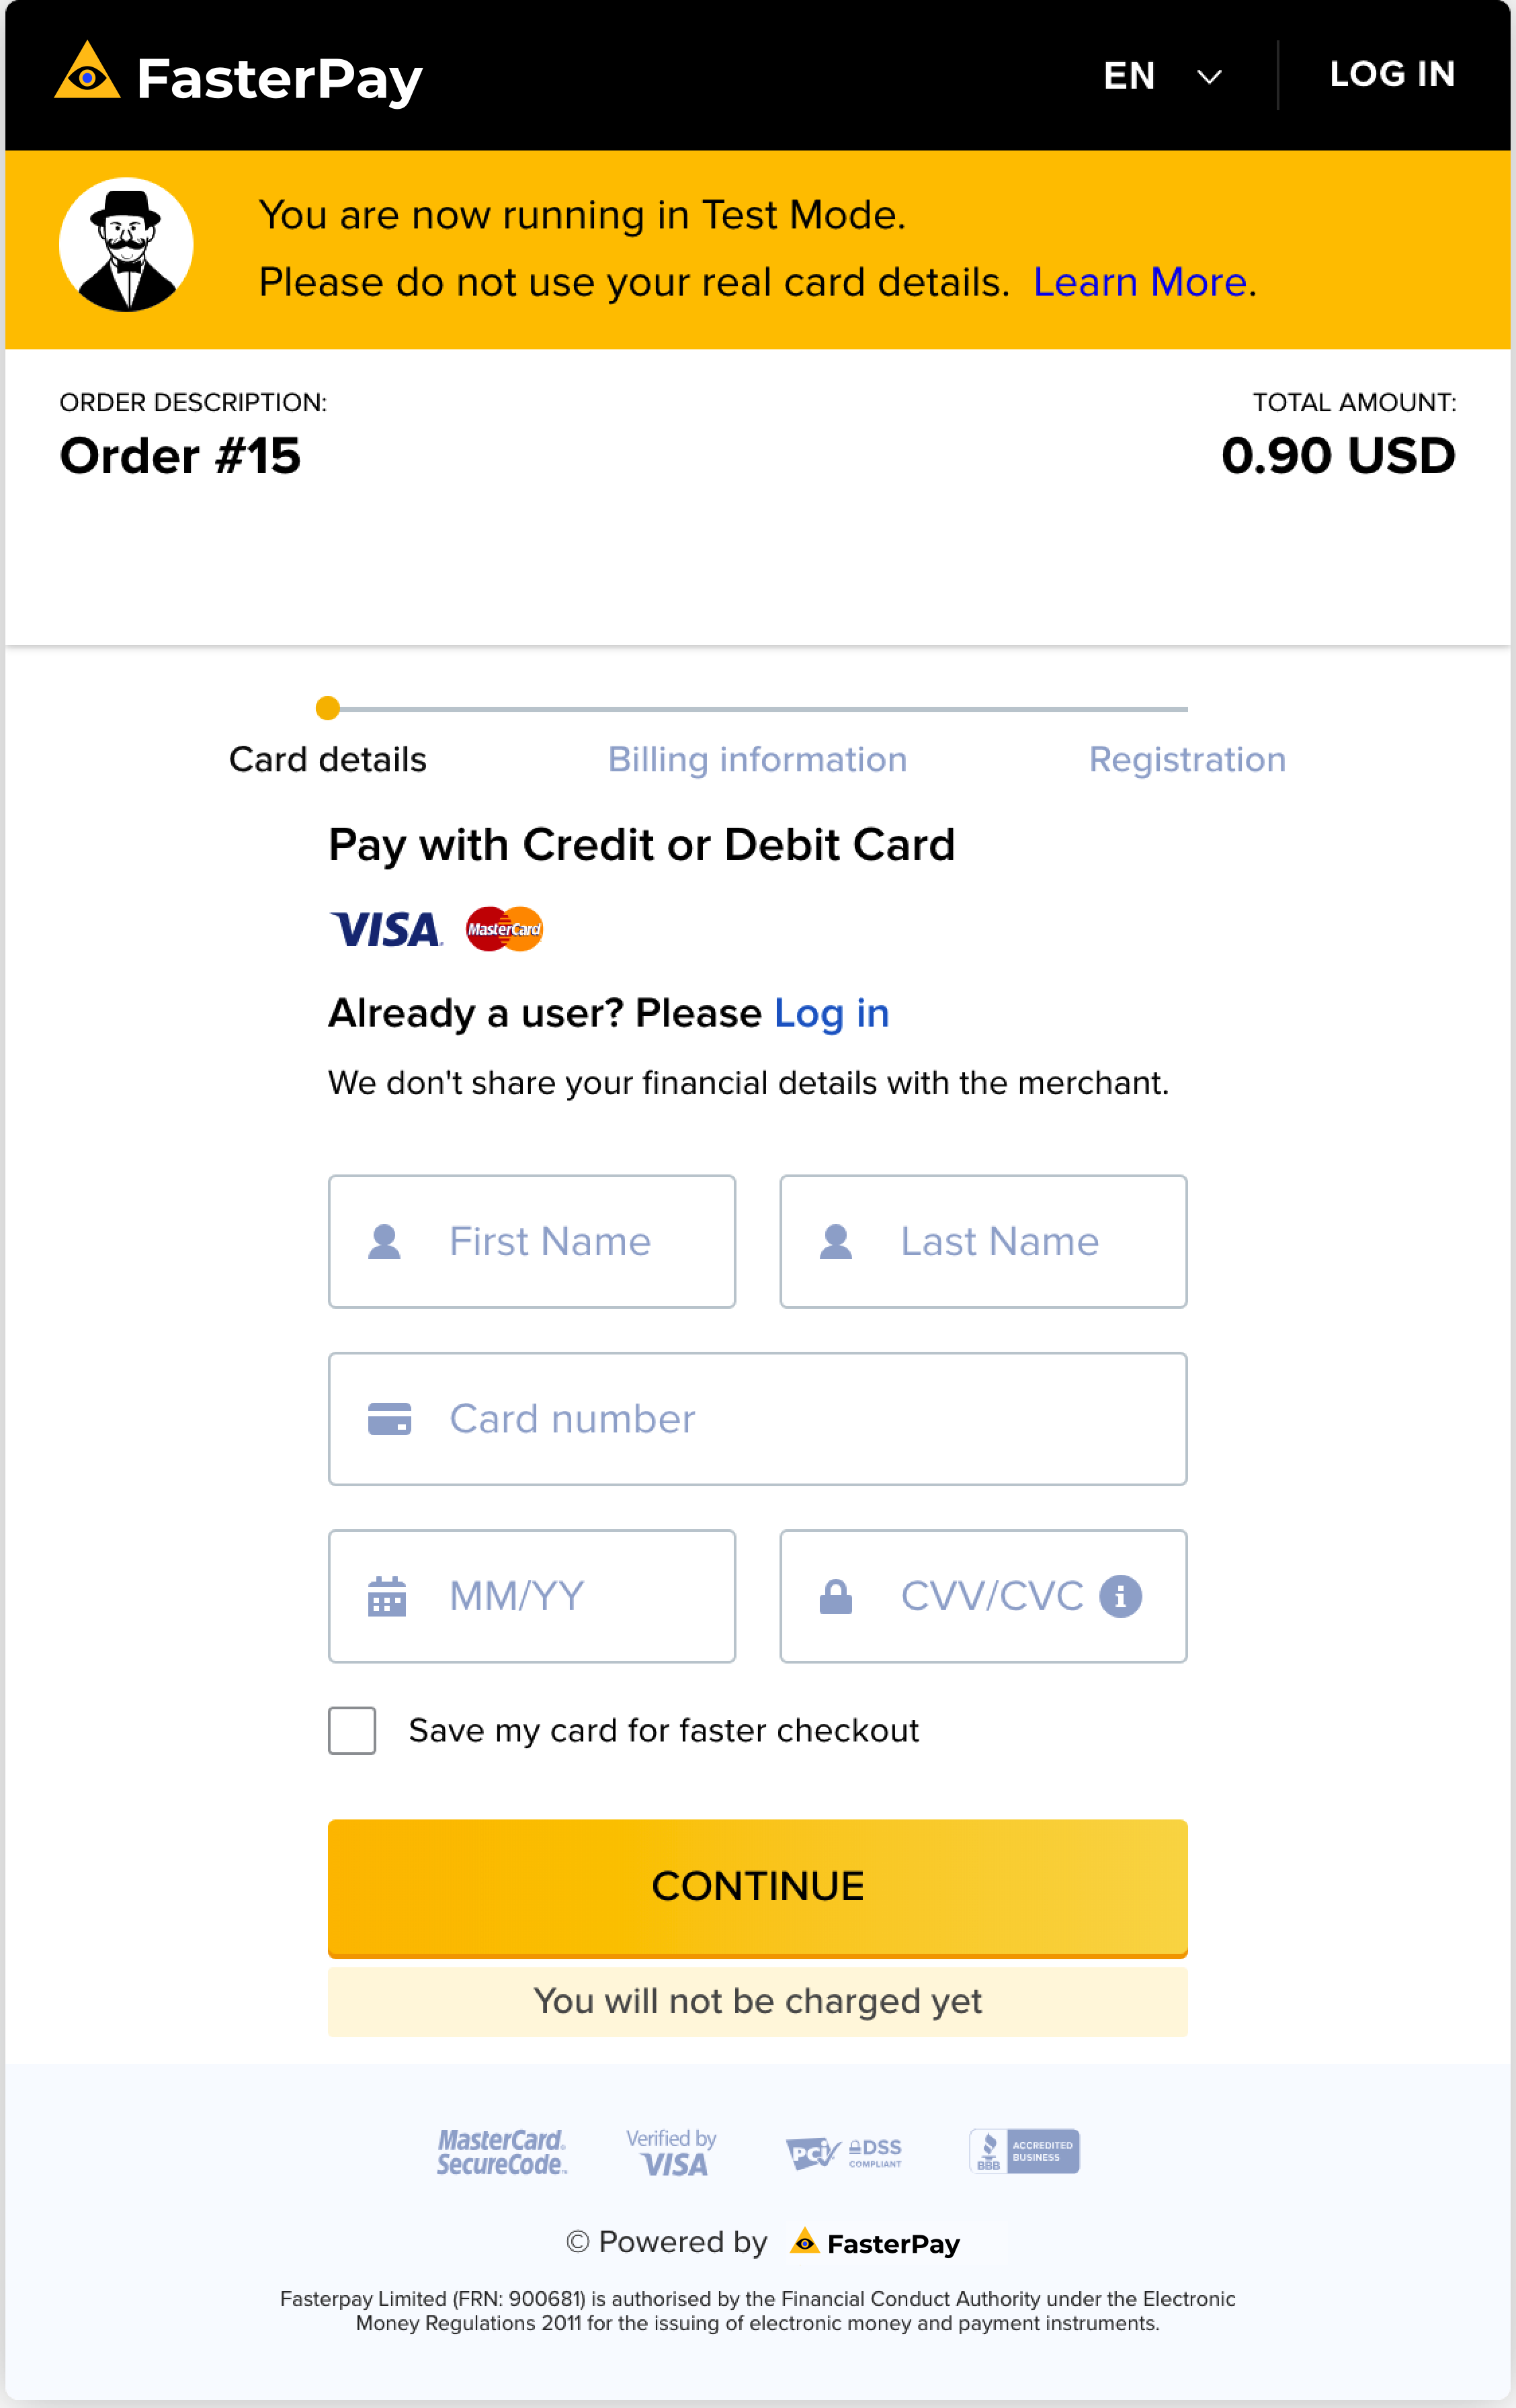
- Go to Woocommerce Settings -> Payments.
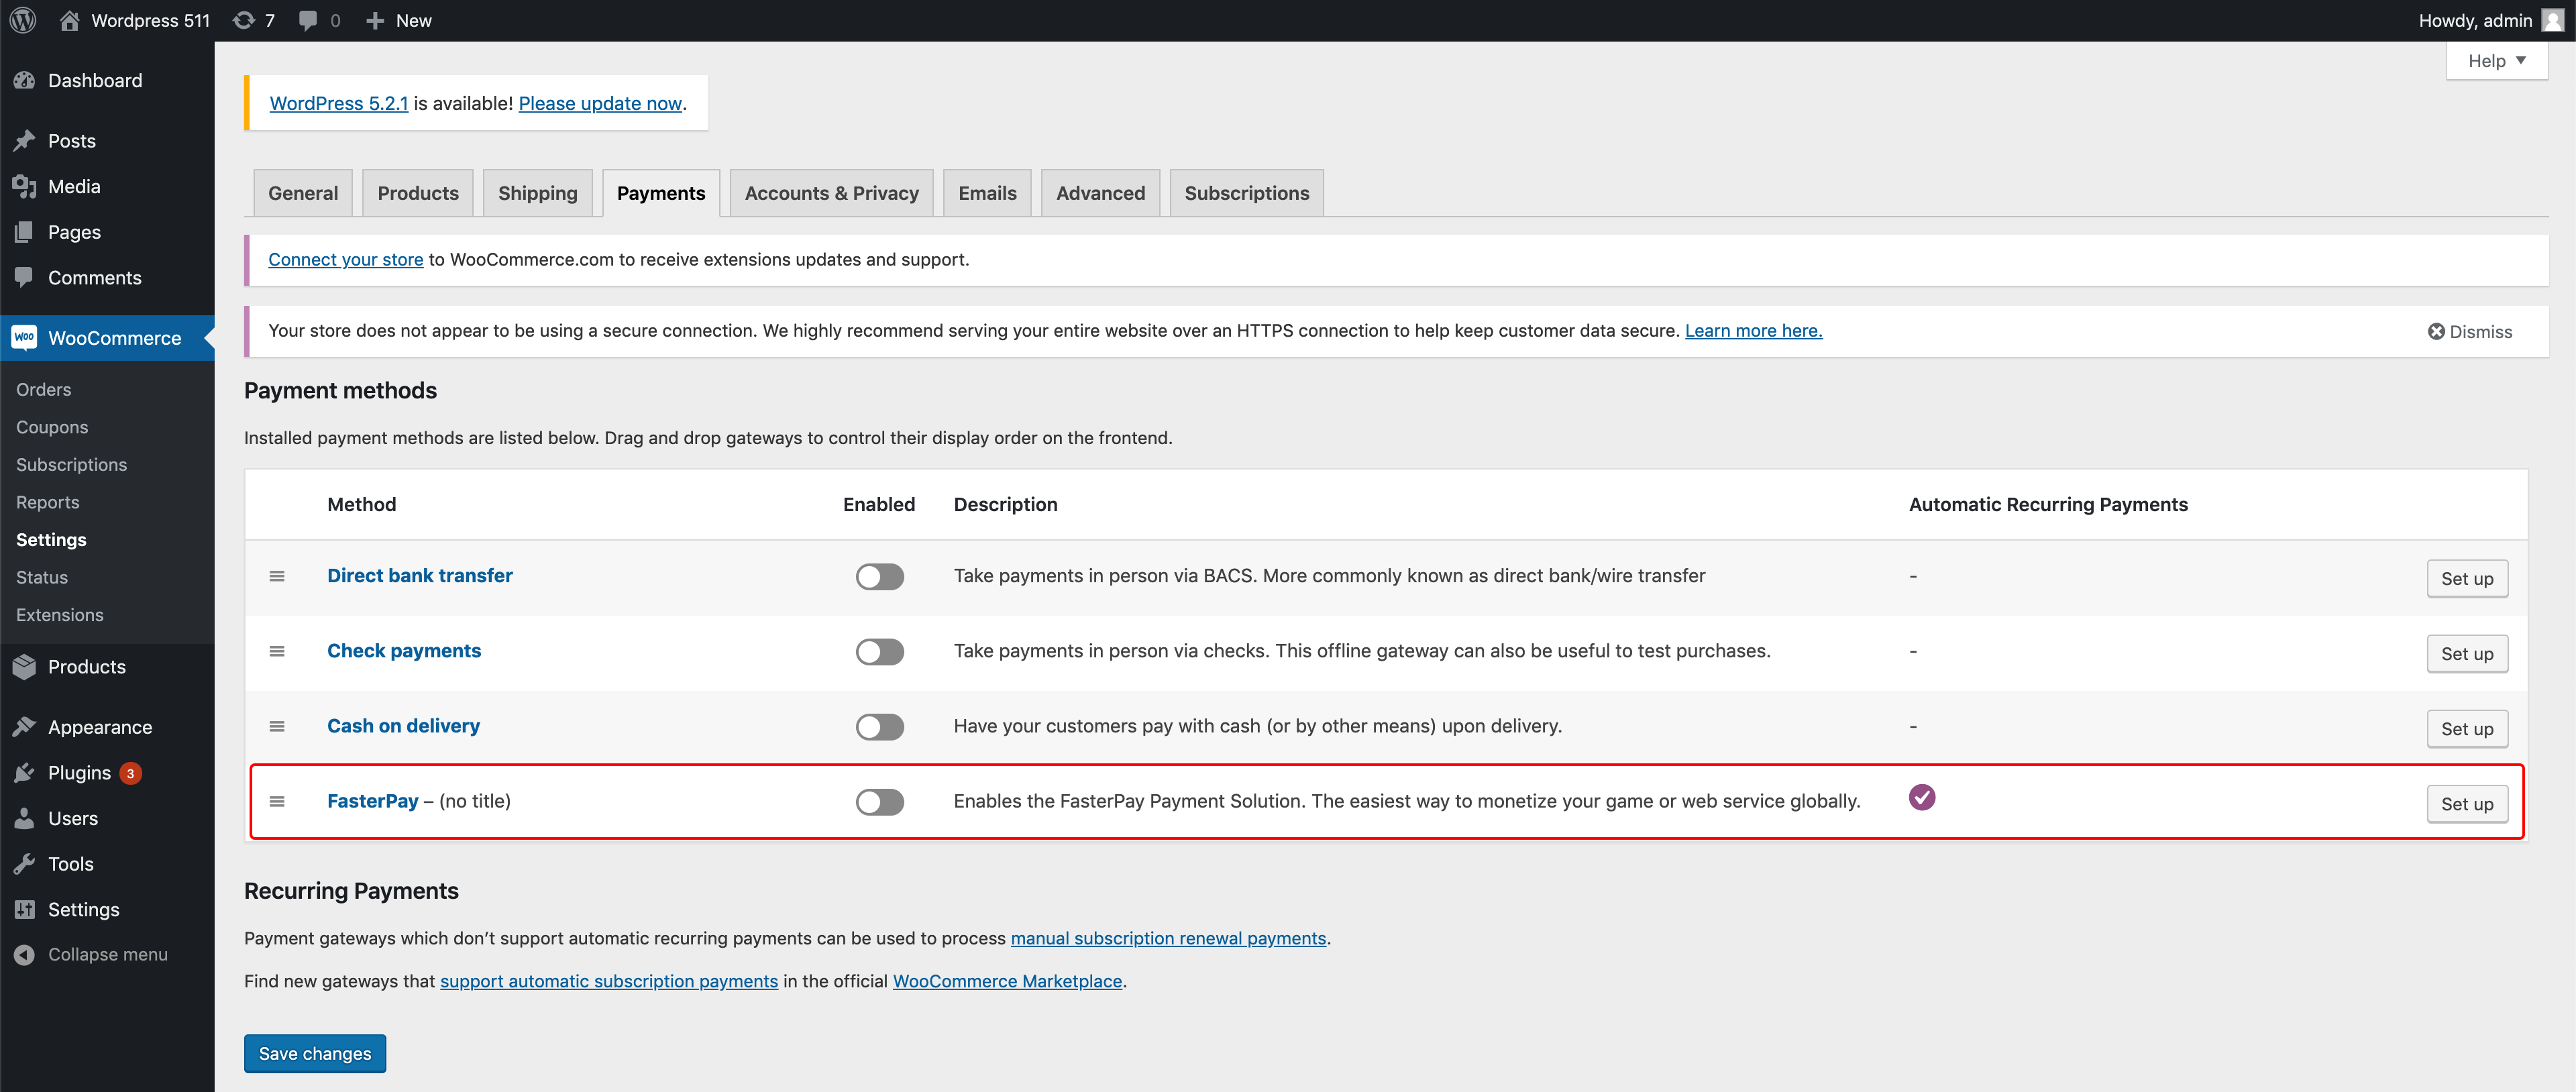
- Select FasterPay in Payment Methods, click on Set up and and fill out all fields.
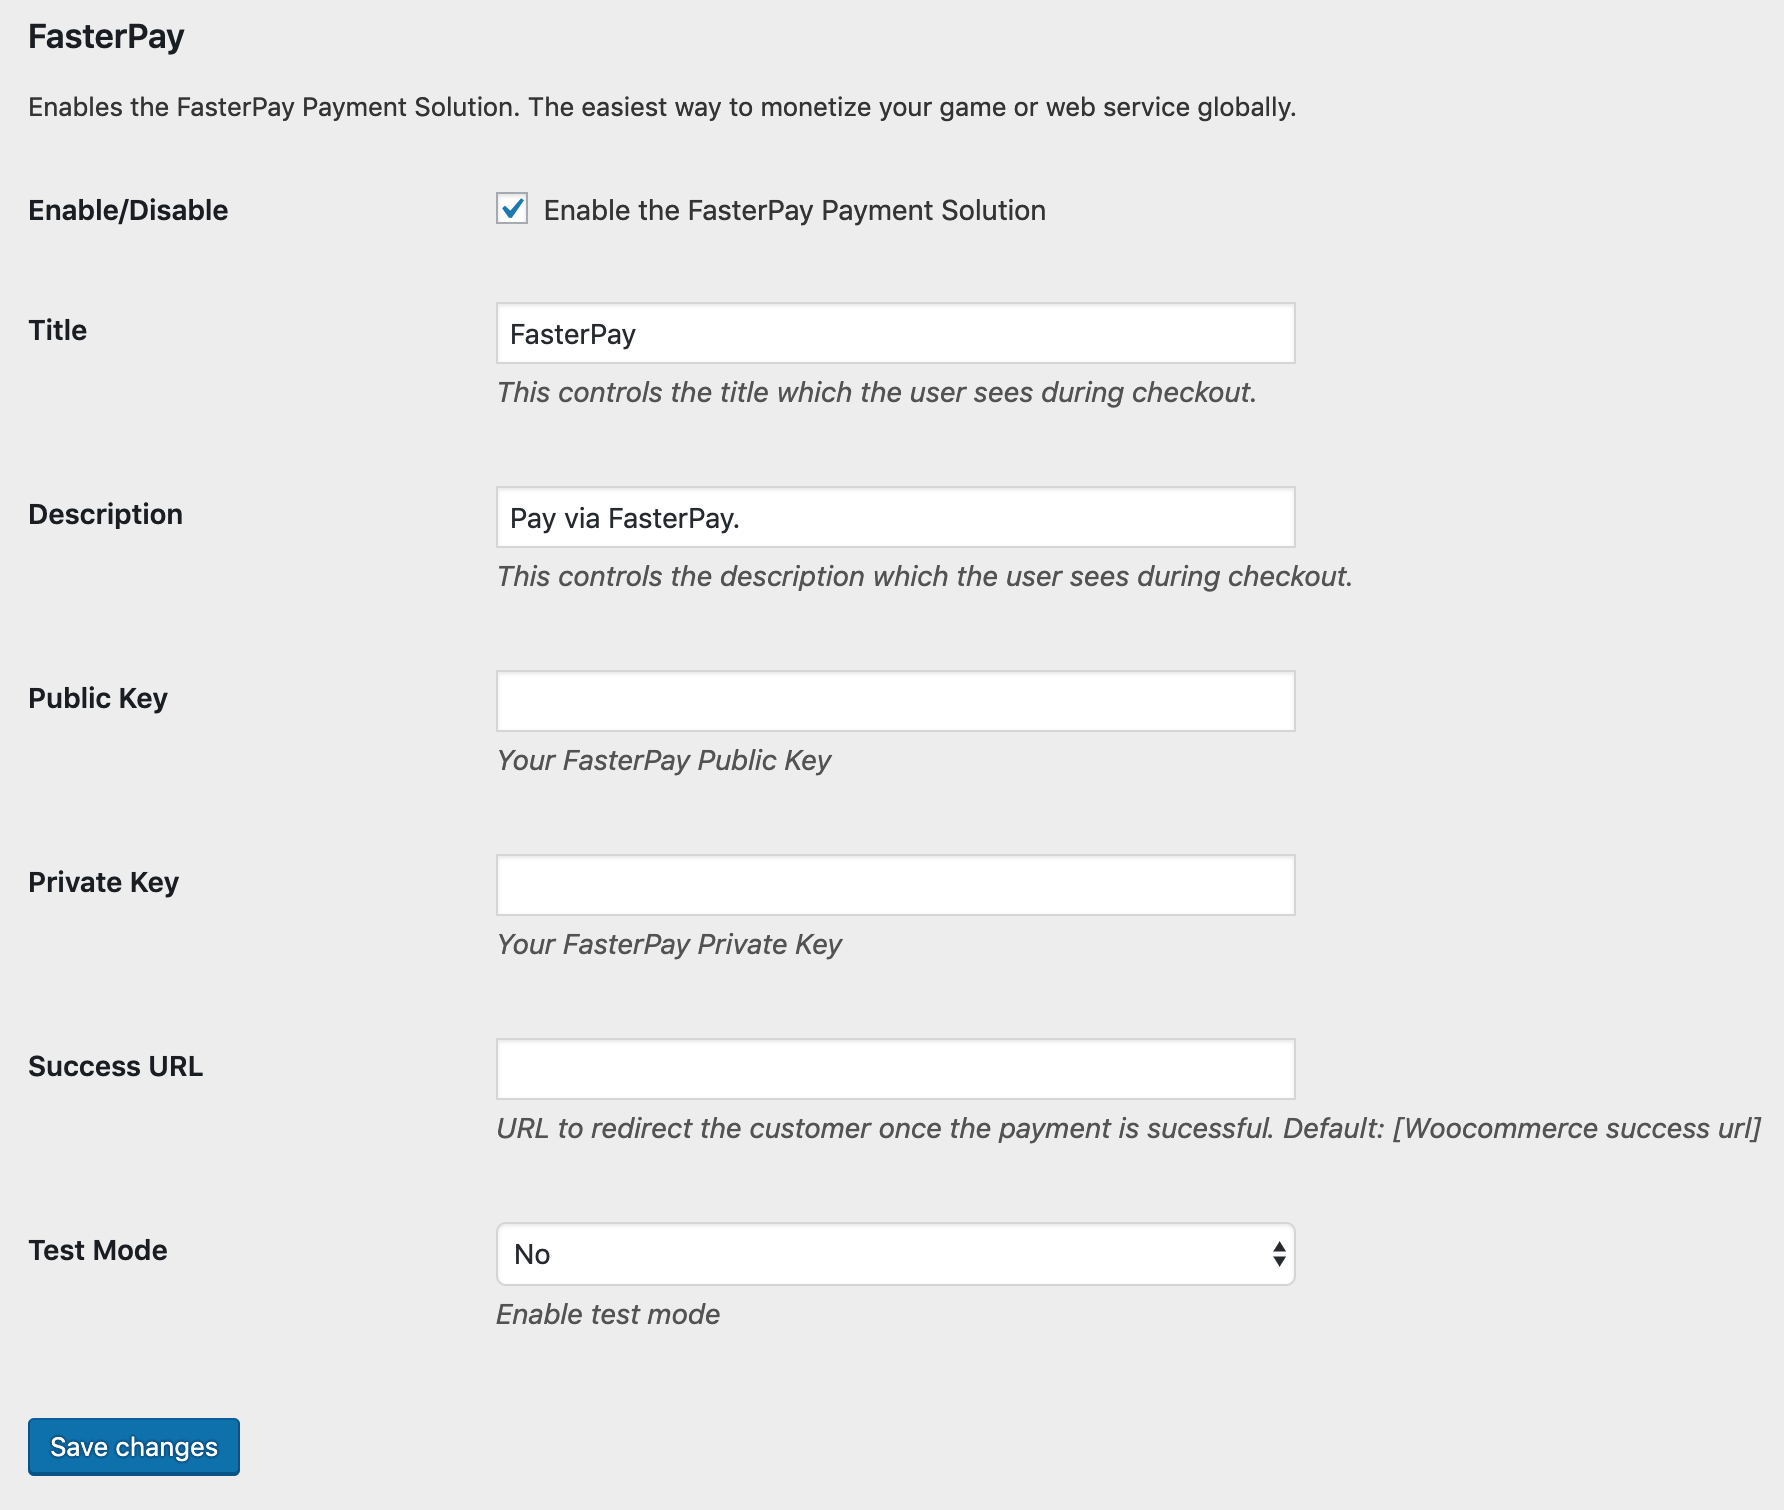
- To start testing instantly on your Woocommerce store, enable Test Mode in your FasterPay Business Area. How to enable Test Mode.
- Go to the Integration tab on the left of your account and here are your Test integration keys. Enter the Test Private and Public Keys in the respective fields in the above screen and select “Yes” for Test Mode.
- Optionally, you can also configure success URL for the module. If success URL is empty, after the payment process, user will be redirected to http://[your.domain]/index.php/checkout/onepage/success.
- Click on Save Config to confirm the settings and you are now ready to test your integration for FasterPay.
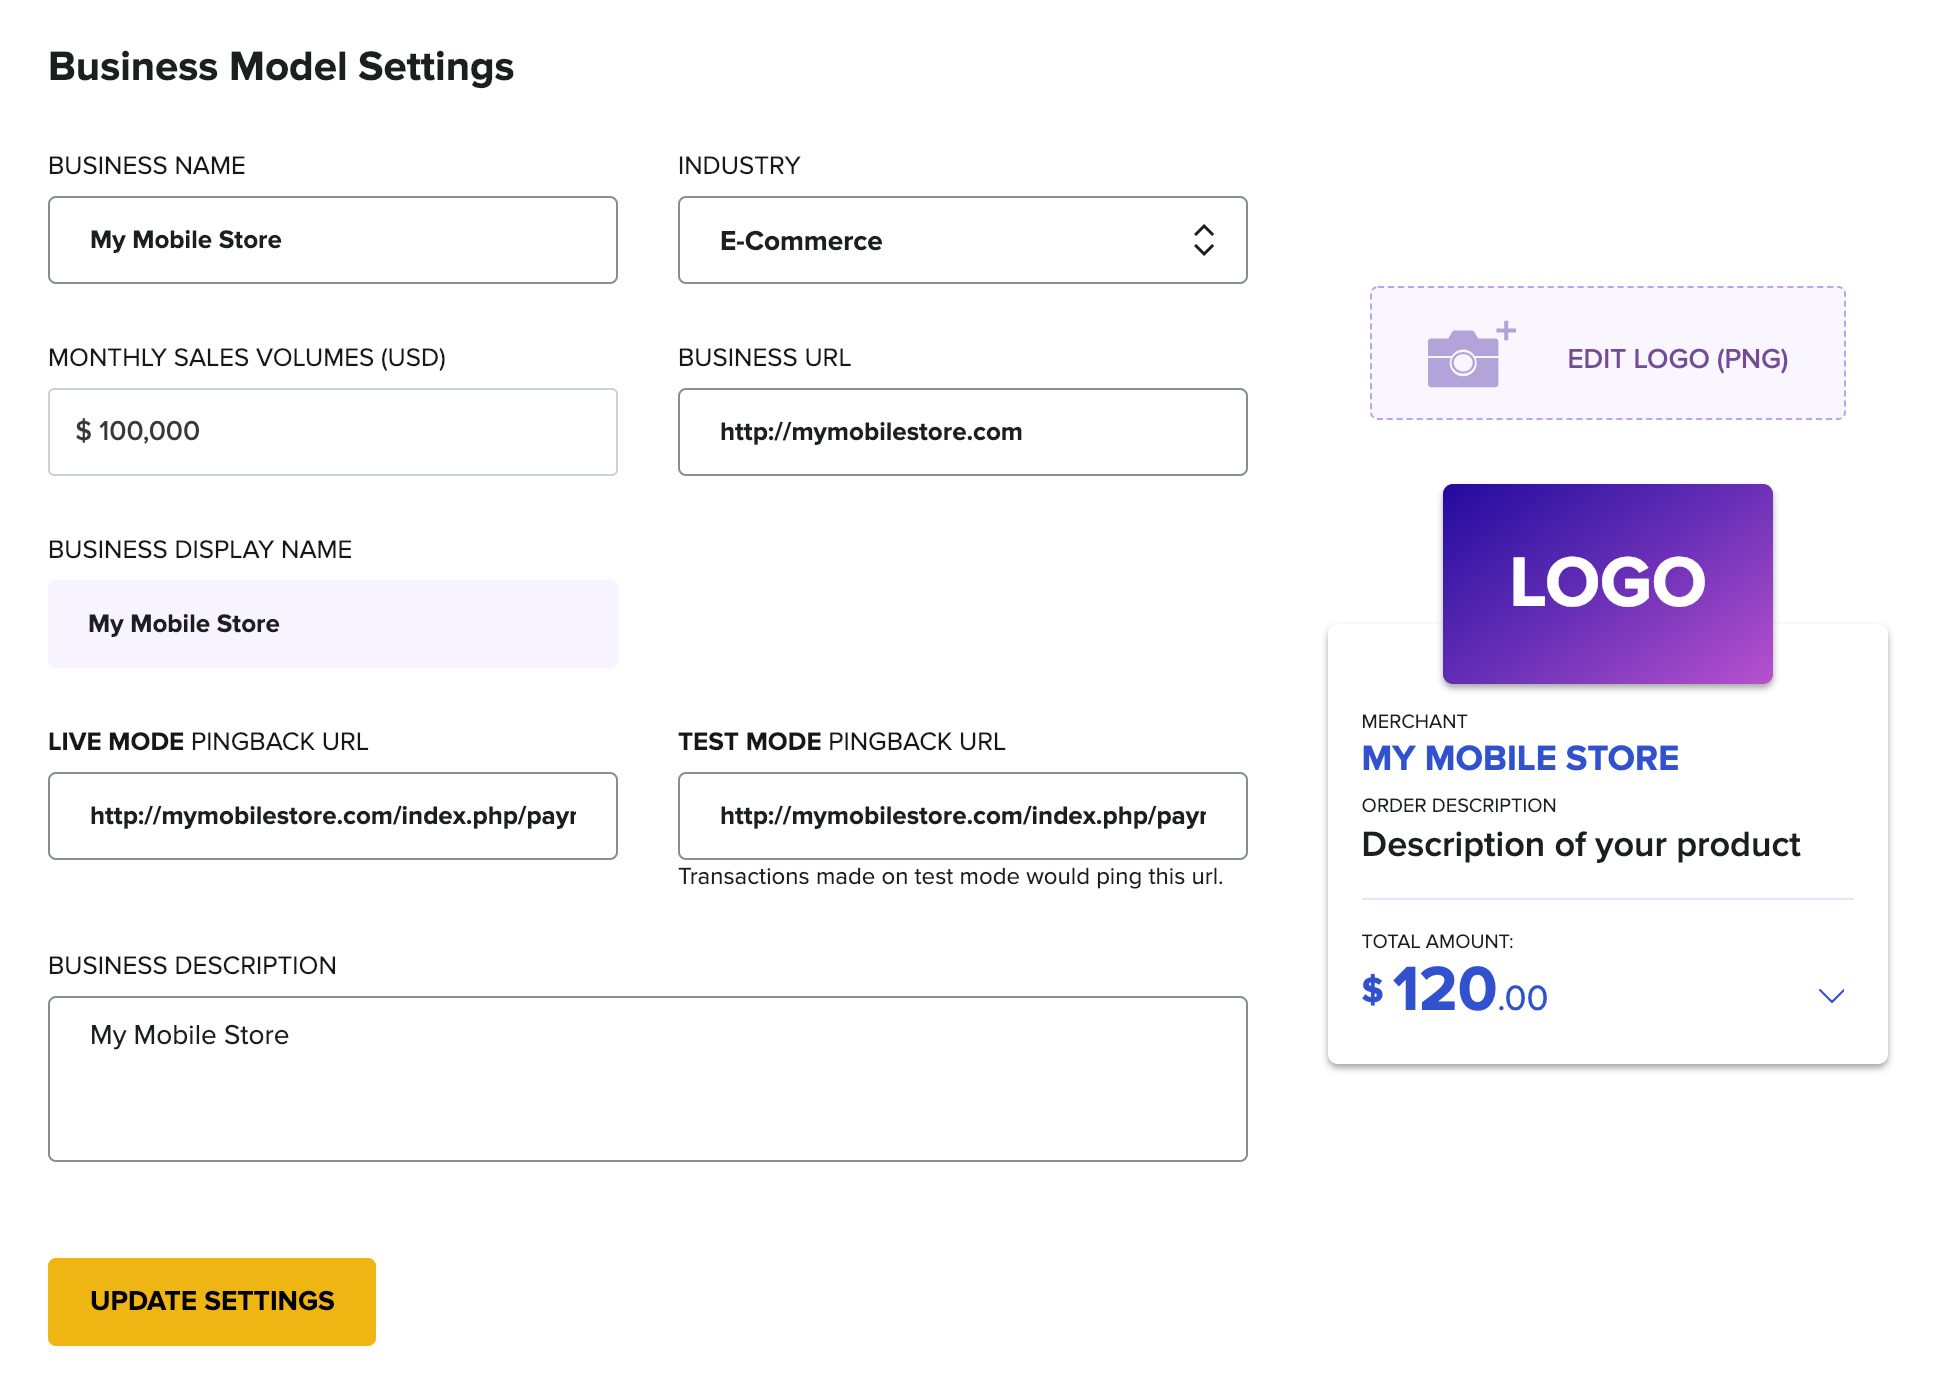
Step 5: Configure pingbacks in FasterPay
Once you have configured the FasterPay module, you have to update the pingback URL in your Business Model Settings.
For new account, Business Model settings can be enabled by disabling Test Mode.
Following URLs should be used in order to receive the pingbacks in test and live environments.
Live mode: http[s]://[your-domain]/?wc-api=fasterpay_gateway&action=ipn
Test mode: http[s]://[your-domain]/?wc-api=fasterpay_gateway&action=ipn
Step 6: Activate Delivery Confirmation
FasterPay provides an easy integration with WooCommerce to track delivery updates. This helps us support your customers better and know the latest status of the delivery.
FasterPay supports WooCommerce’s official Shipment Tracking for implementing Delivery Confirmation API. You need to download Shipment Tracking extension for WooCommerce store and follow the steps below to activate.
- Download the .zip file from your WooCommerce account.
- Go to: WordPress Admin > Plugins > Add New and Upload Plugin with the file you downloaded with Choose File.
- Install Now and Activate the extension.
For E-Commerce Businesses, activation of Delivery Confirmation also makes your project compliant with Visa & MasterCard policies. Please go through our Requirements for E-Commerce businesses.
If you have a customized checkout flow or have troubles implementing the plugin, please contact the Integration Team via integration@fasterpay.com for faster resolution.
Step 7: Let’s Go Live!
The following steps are needed to be completed in order to go live with FasterPay.
Complete your Business Account Settings
Once your Business is approved by our Internal Teams, you should see the following on your FasterPay Business Area.

Enable your Store with FasterPay Live keys
To set your store live for accepting payments, you can simply go to your FasterPay Business Area, in the top right corner find the Test Mode switcher, disable the Test Mode switcher.
Grab the keys from the API Configuration Page in Business area and update the keys in your Woocommerce Store as indicated in Step 4. Make sure you set Test Mode to “No” in your module config.
Once these steps are complete, you can now start processing live payments on your Woocommerce store.
Payment Flow Summary
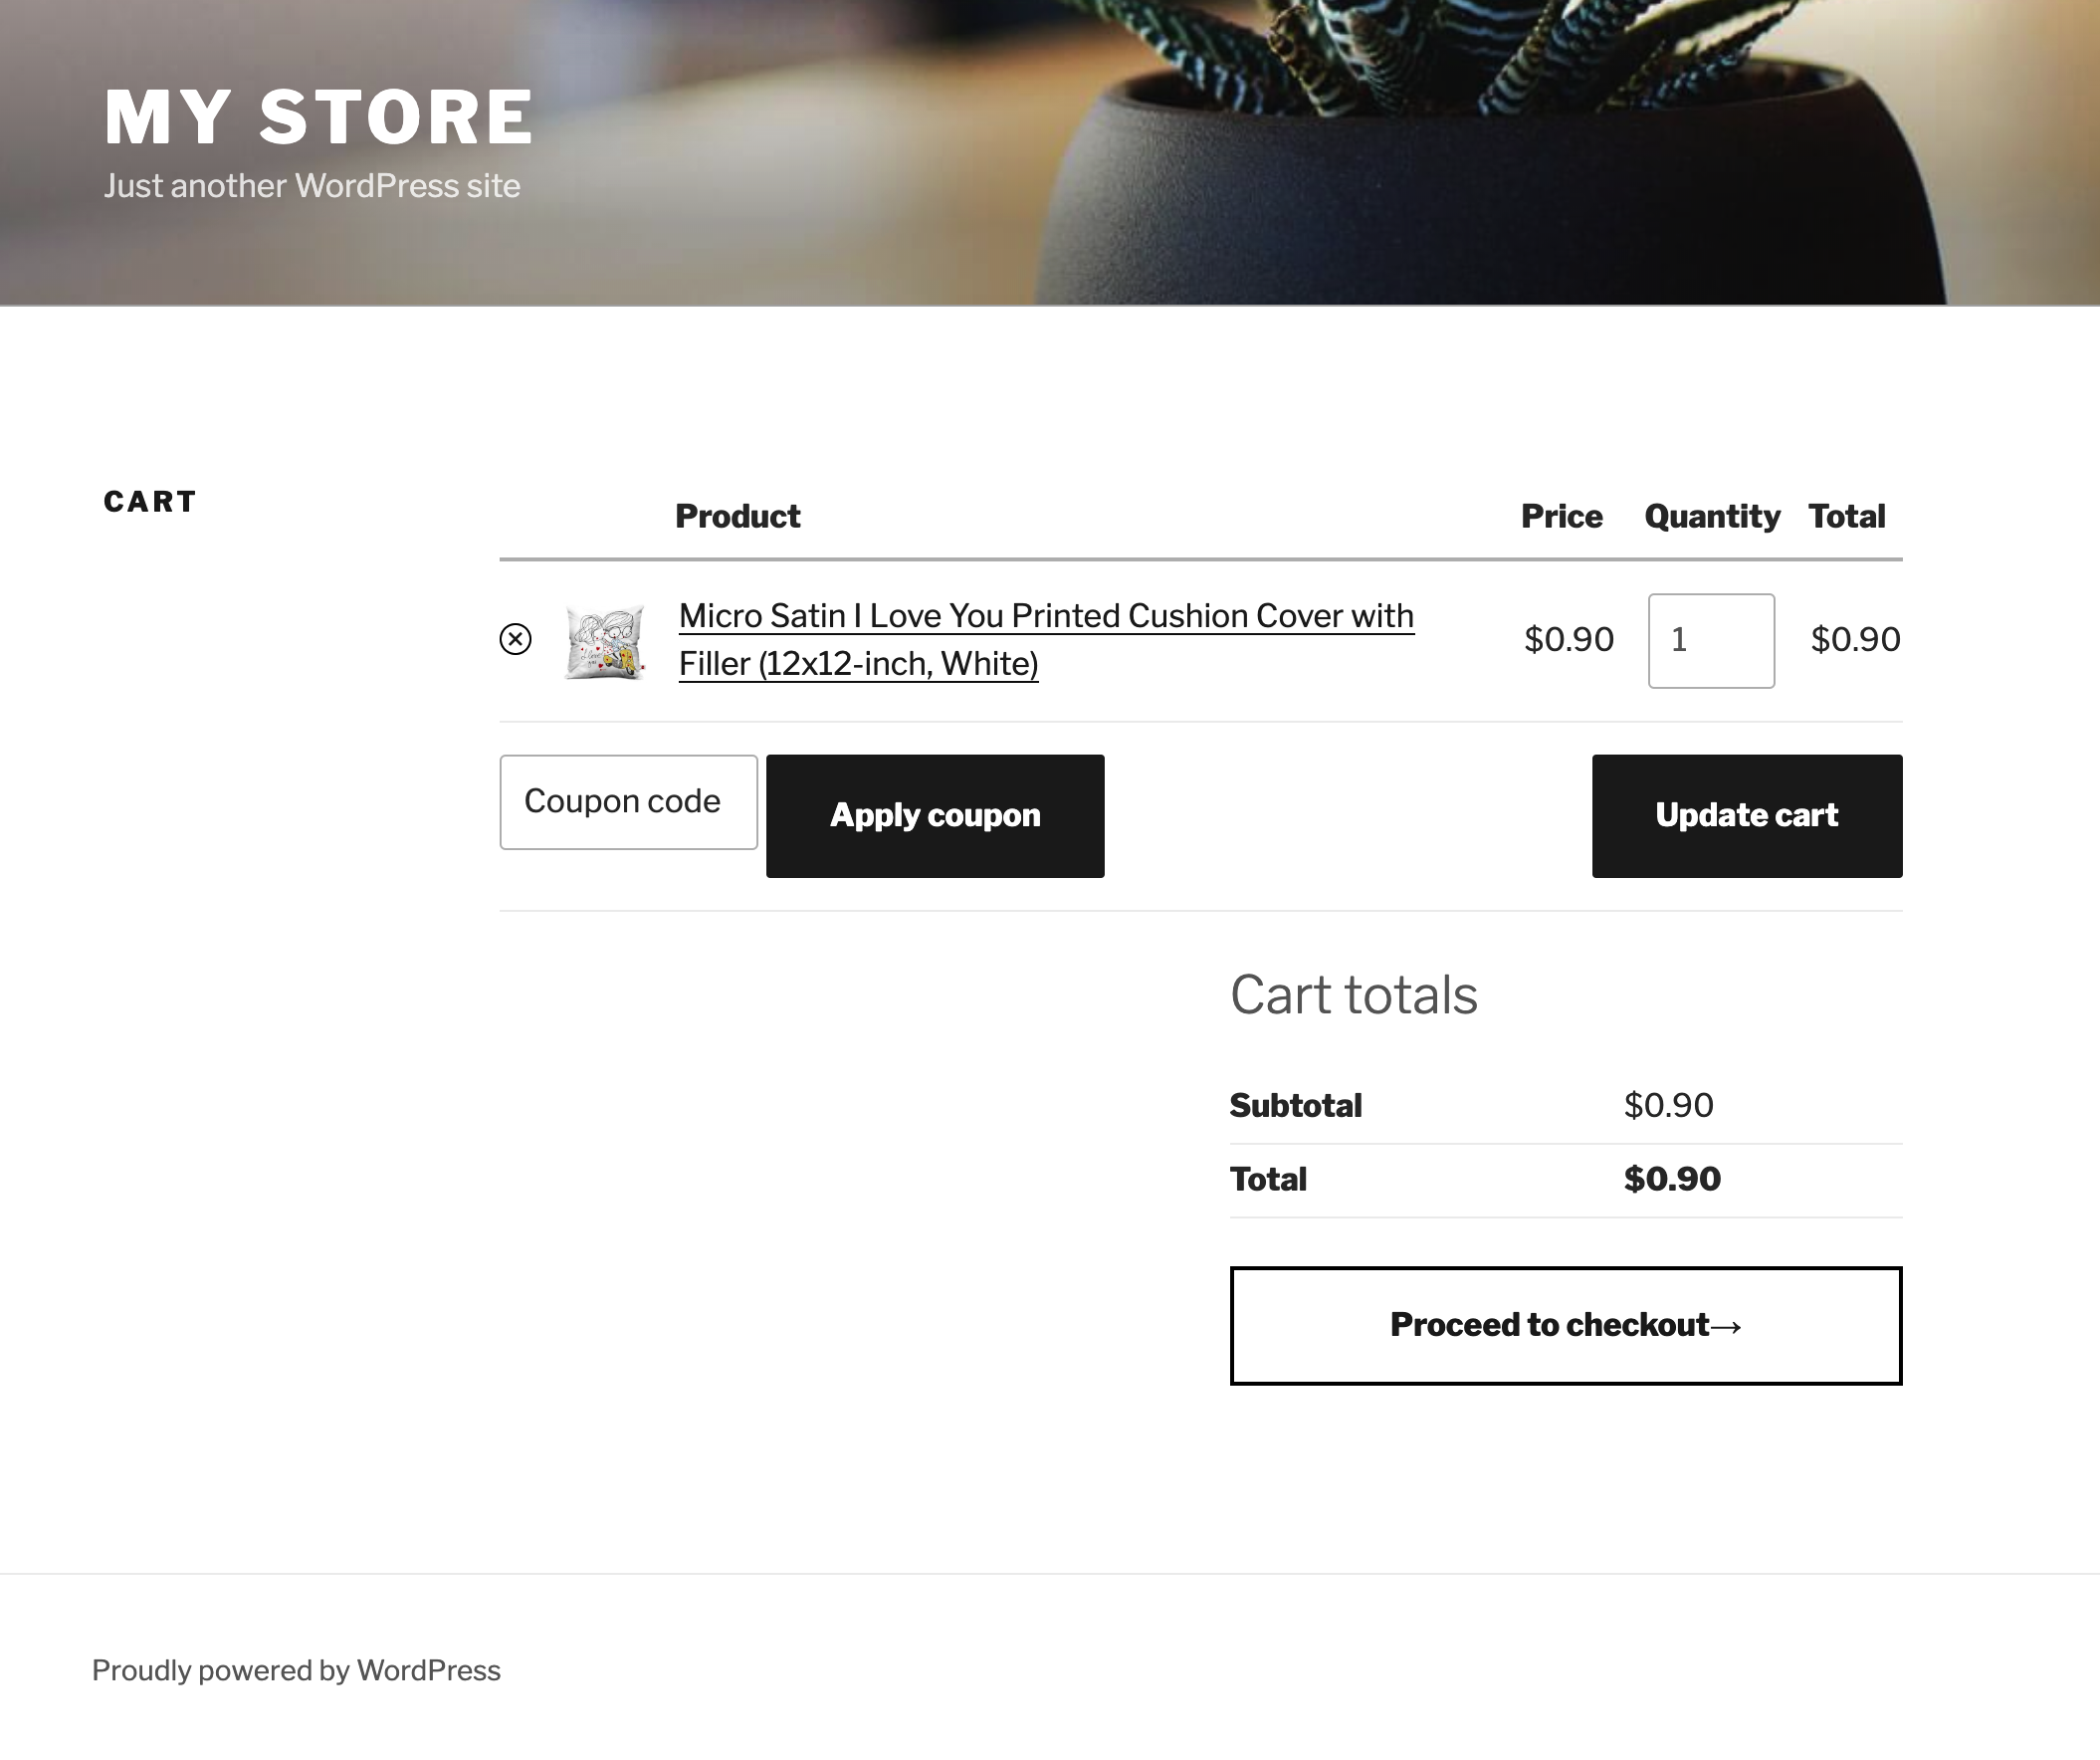
Viewing Cart Details
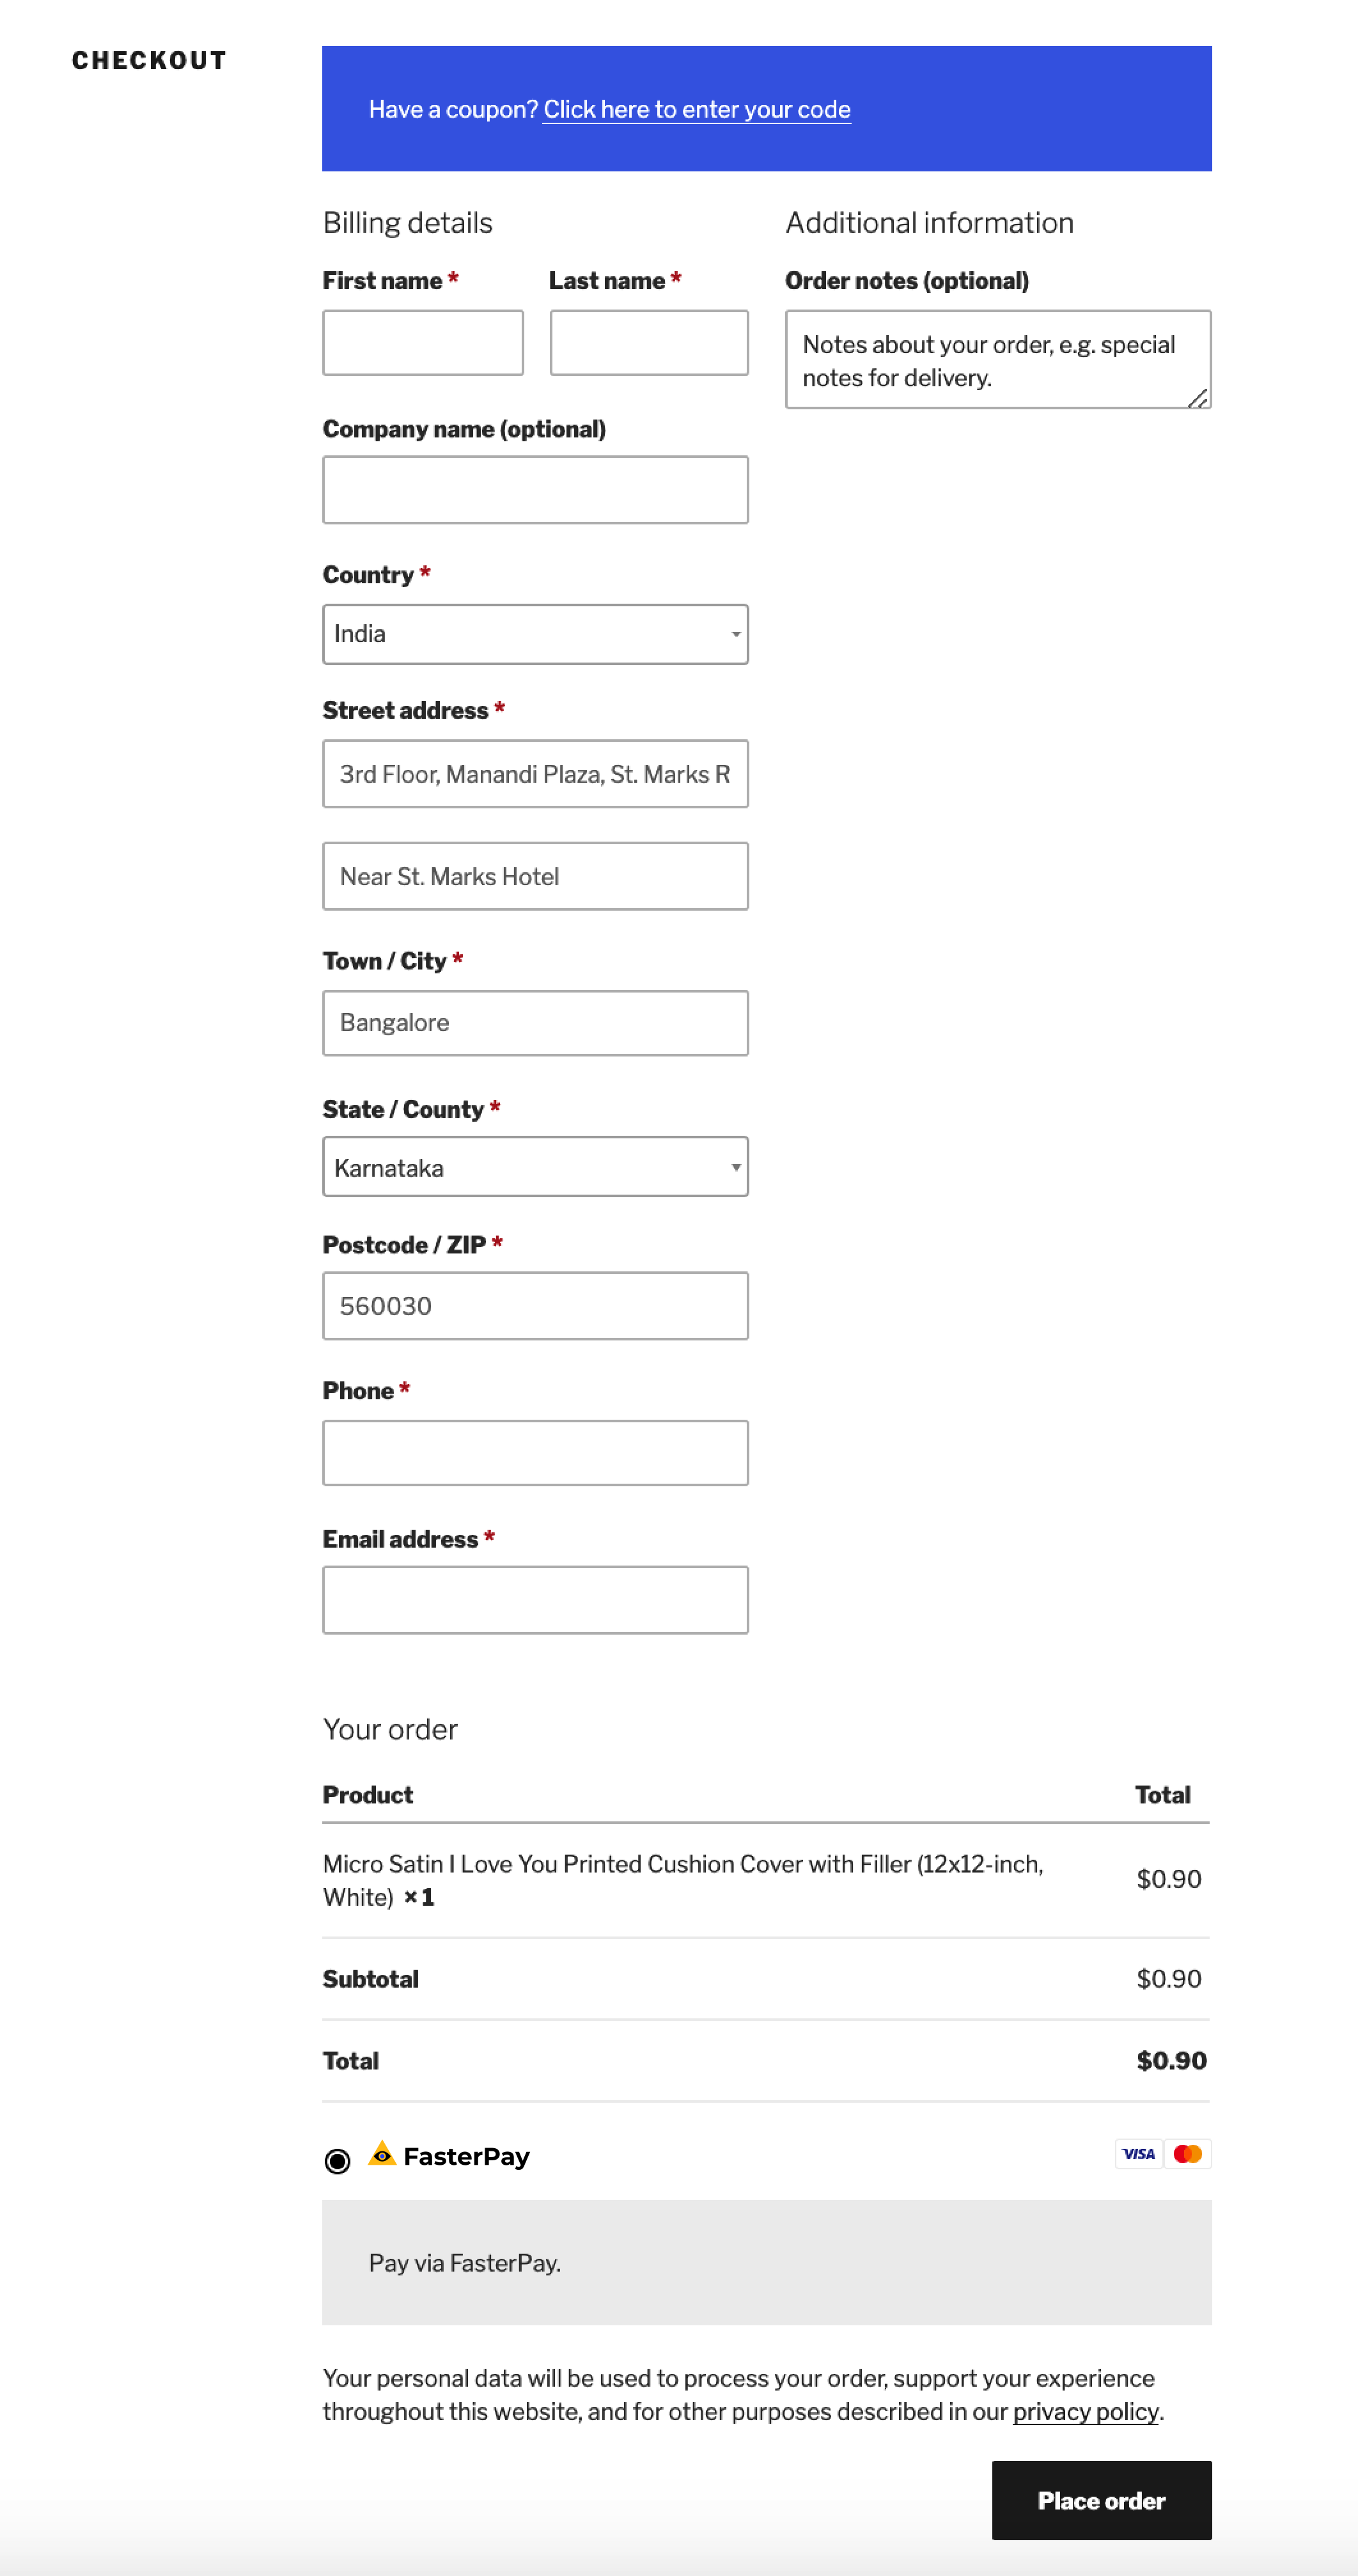
Select Payment Method
FasterPay Payment Page
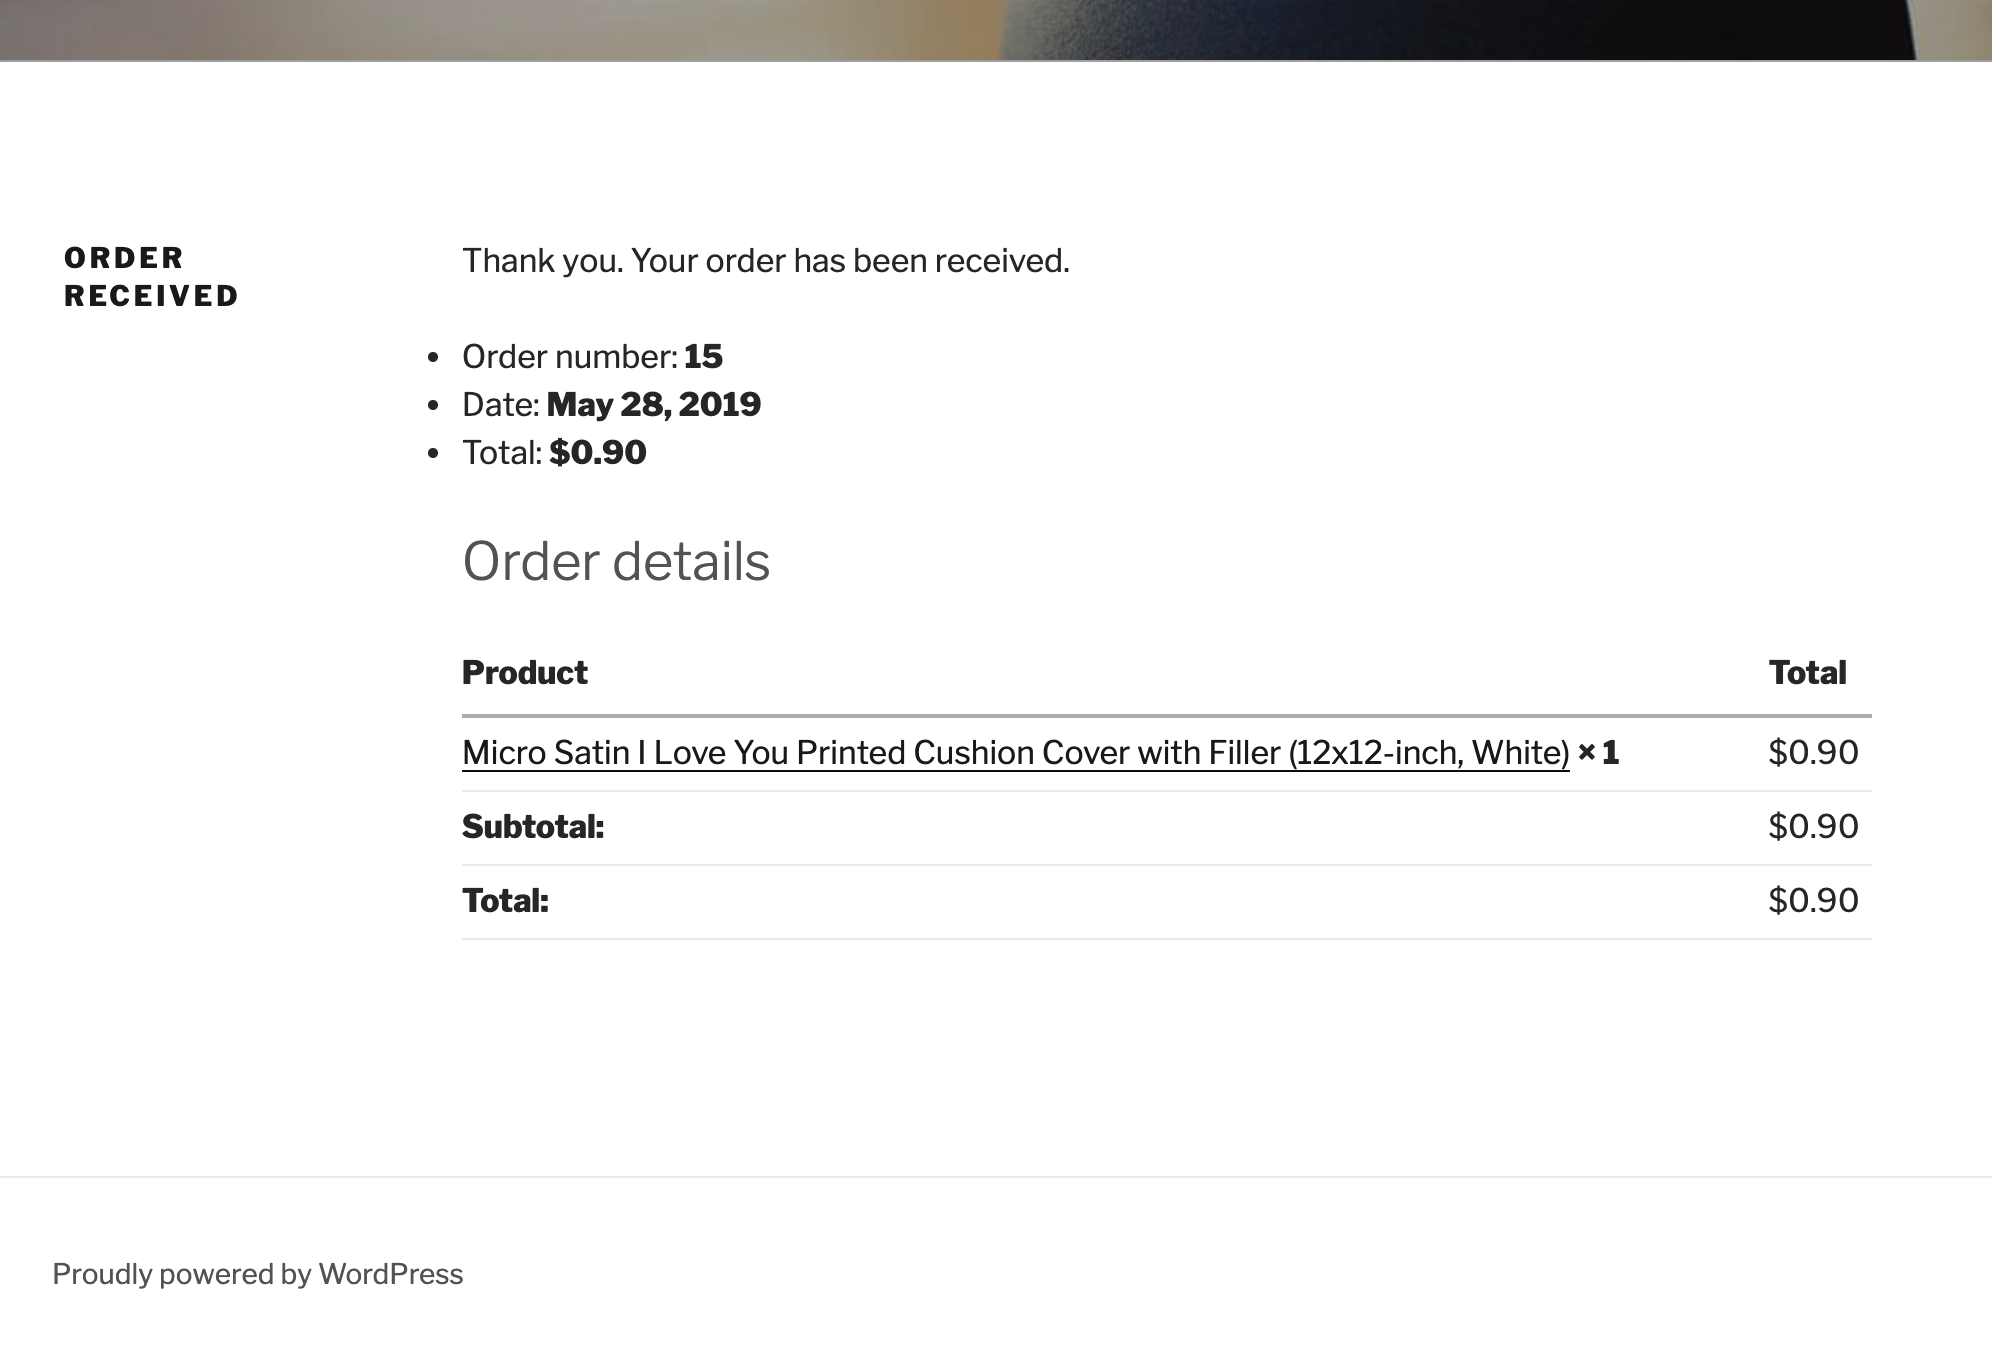
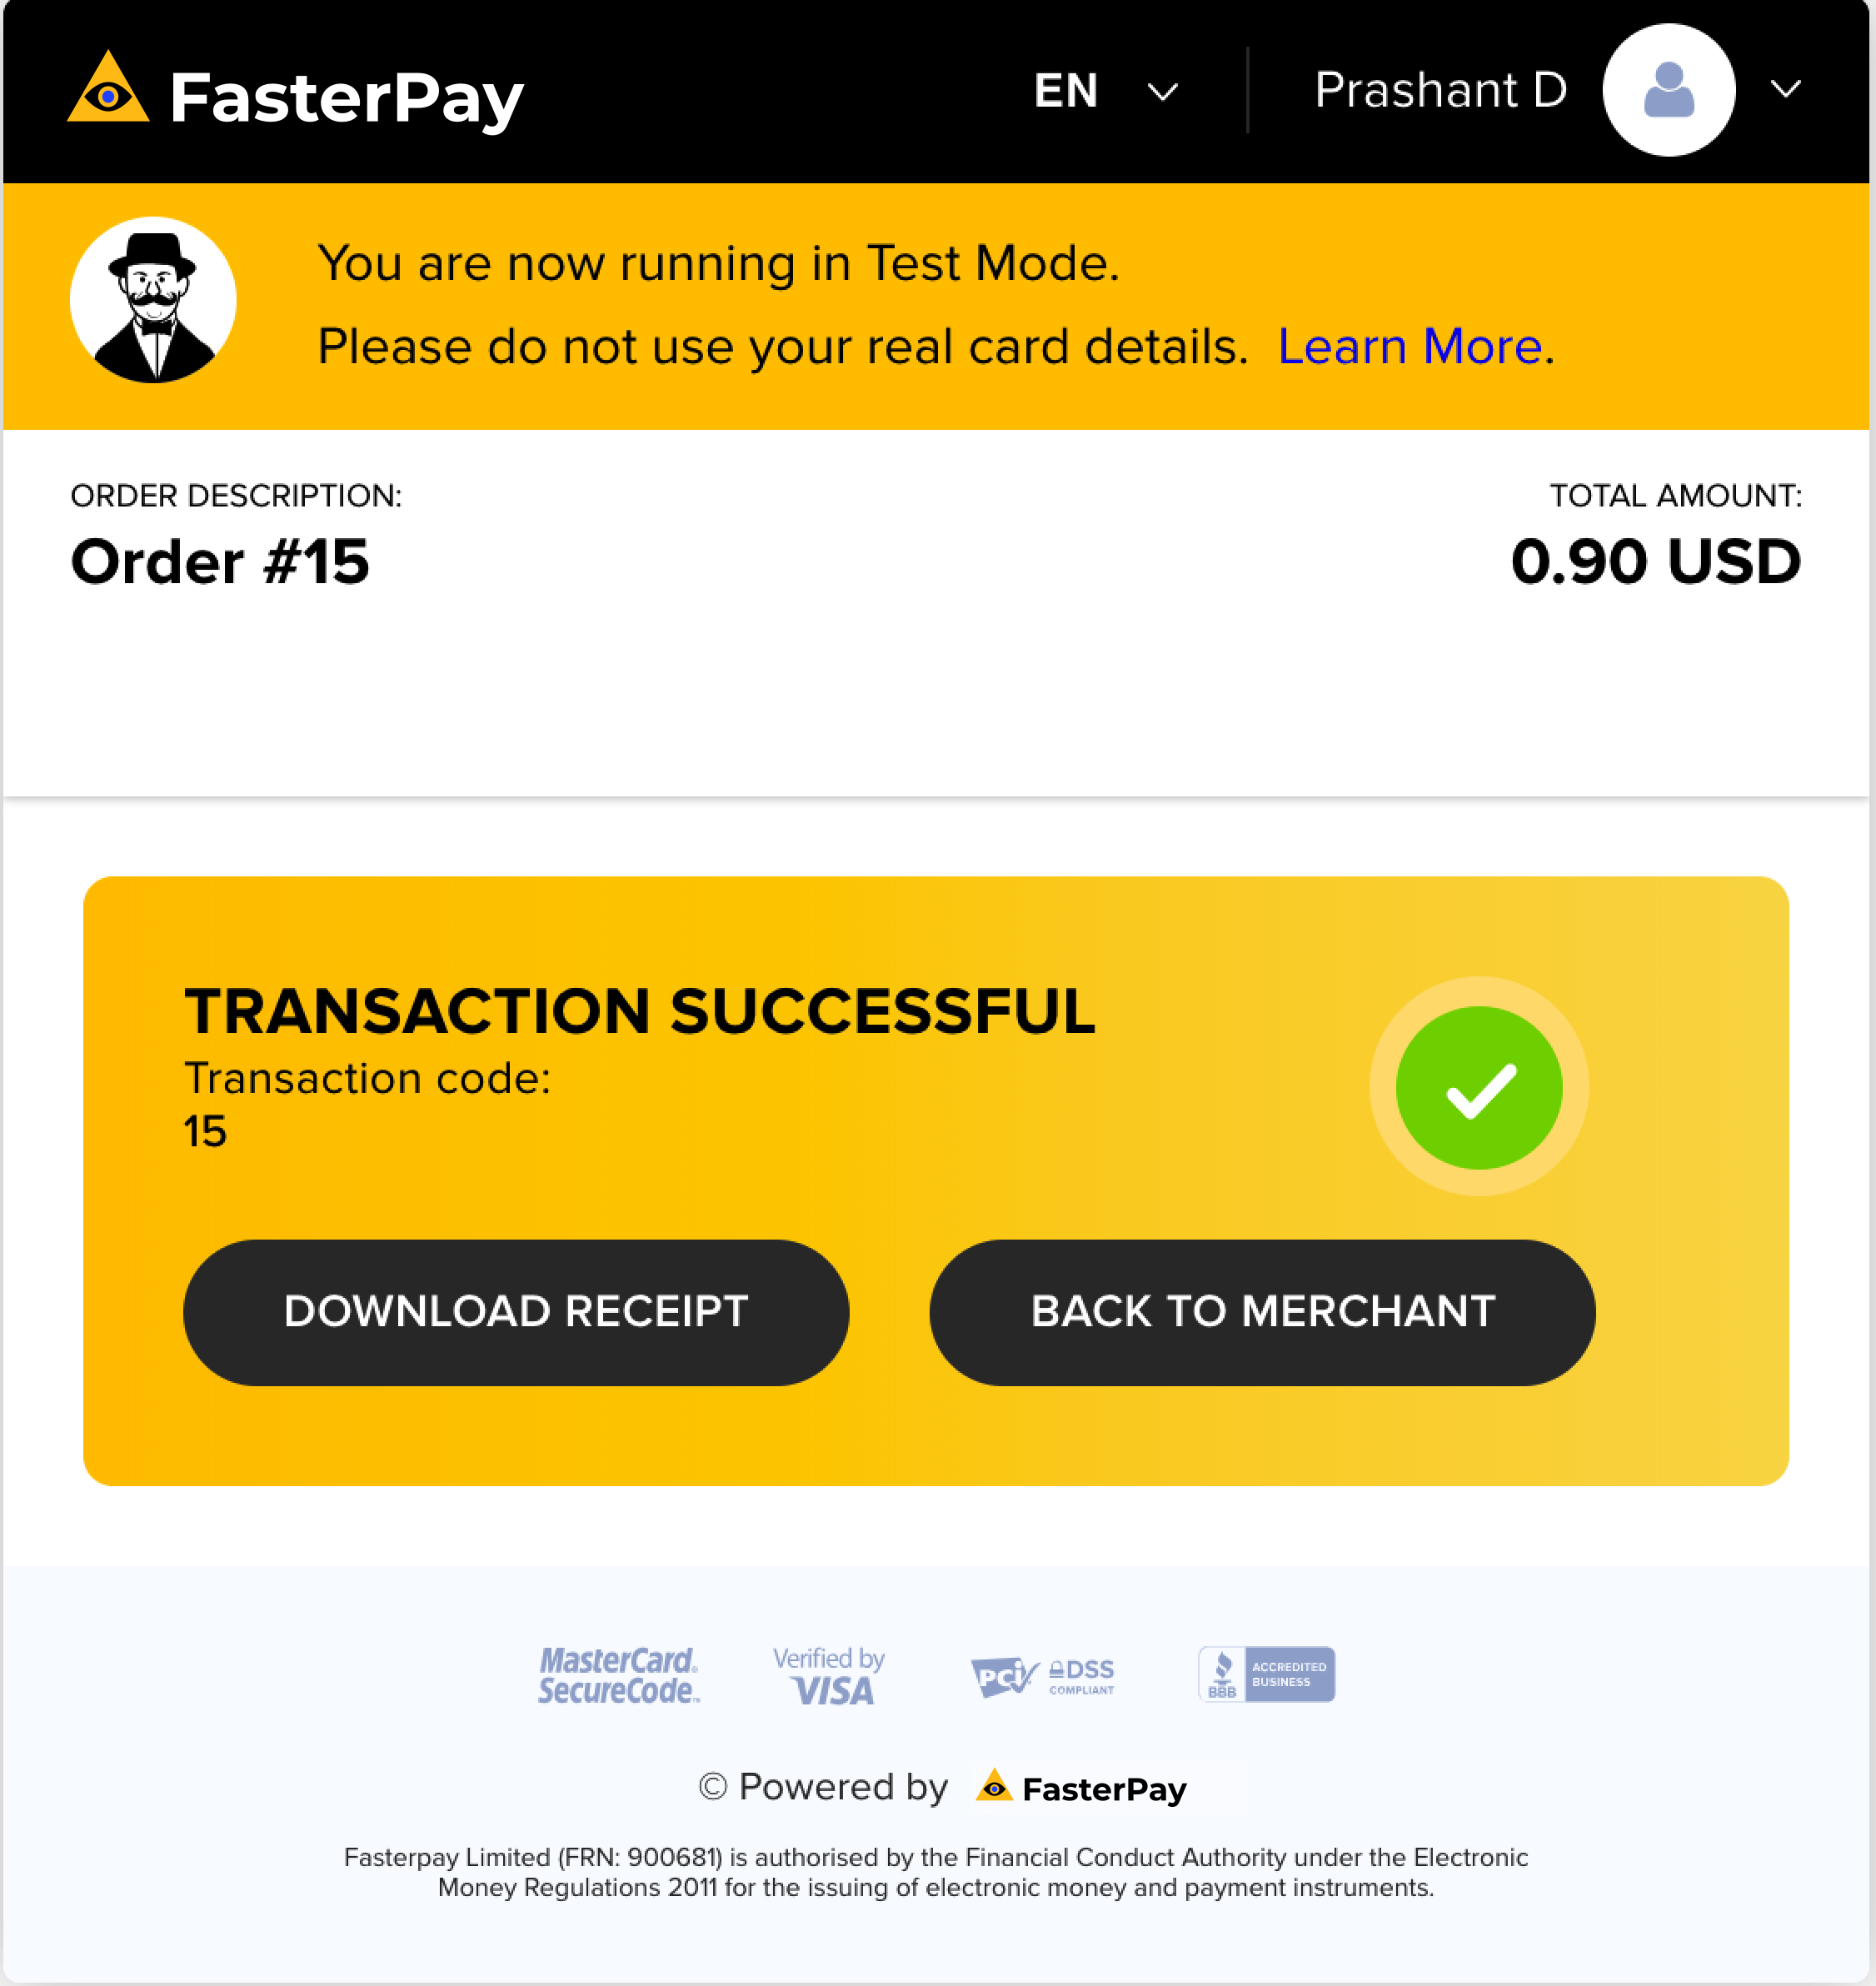
FasterPay Payment Success Page
Purchased Product Information